Create a table
Method 1
- Click on the insert tab
- Click on table
- Hover over the number of columns and rows for the table. When you get the desired number of columns and rows click on it
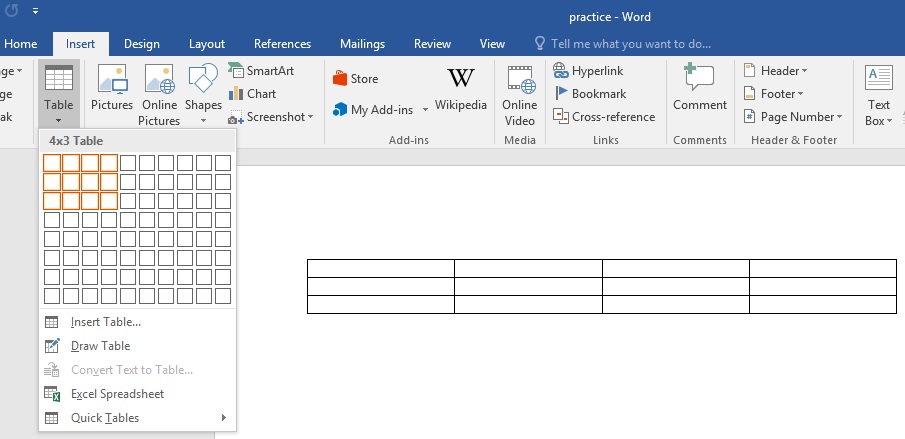
Figure: Insert table
Method 2
- Click on the insert tab
- Click on Insert Table
- Enter the number of columns and rows for the table in the table dialog that appears
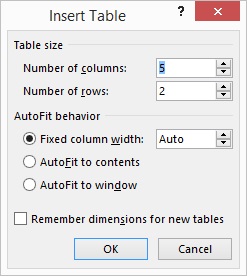
Figure: Table columns and rows dialog box
Method 3
- Click on the insert tab
- Click on Draw Table
- Use the pencil cursor to draw your table
Merging cells
Merging enables you to join two or more cells together and make them one cell. To merge cells follow the steps below:
- Highlight the cells with the mouse.
- Right click on any of the selected cell
- Select merge cells in the options that show
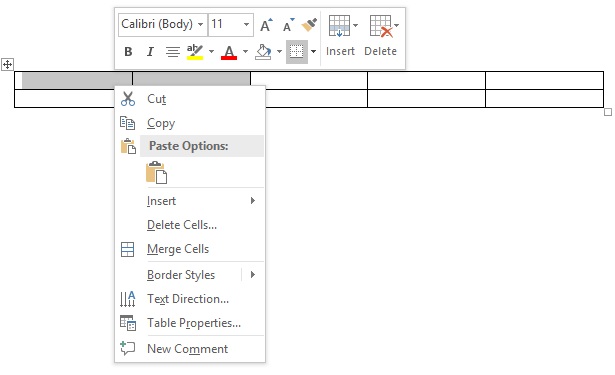
Figure: Merging cells
Borders & Shades
Removing table borders
- Click on any cell to show the table move handle at the upper left of the table
- Right-click on the table move handle and select Table Properties
- In the Table Properties dialog click on Borders & Shading
- In the borders tab select None and click Ok

Figure: table move handle
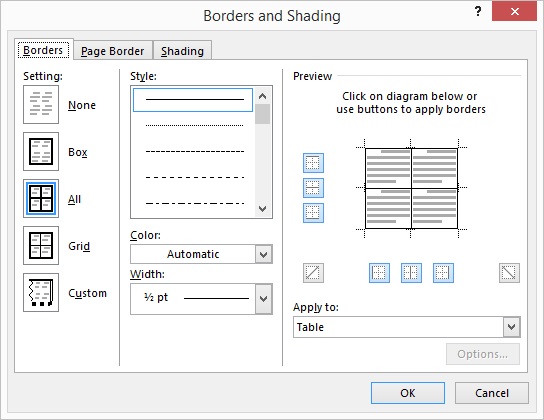
Figure: Table borders dialog box
Adding table borders
- Repeat steps 1-3
- In the borders tab select the desired border type (Box, All, Grid or Custom).
Shading Table Cell(s)
- Select the cell(s)
- Right-click in any of the selected cell(s)
- Select Table Properties
- Click on the Shading tab
- Select your appropriate color for the Fill
- Click Ok for the dialog boxes to disappear
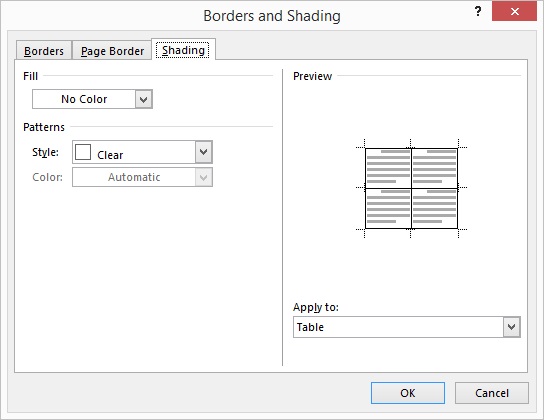
Figure: Table shading dialog box
Changing Text Direction Of Cell
- Right-click in the cell
- Click Text Direction
- Choose your desired orientation from the dialog box and click ok
- Adjust the text using the enter and space keys if necessary
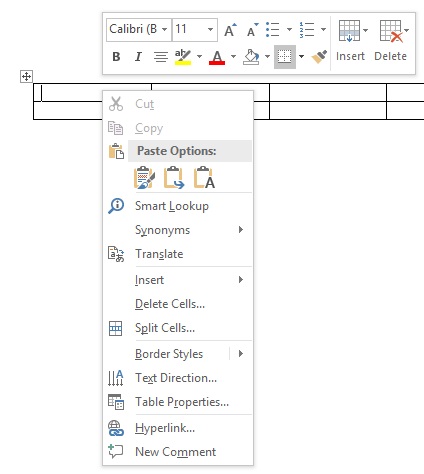
Figure: Text Direction option
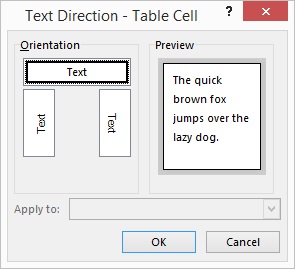
Figure: Text Directions
Design the time table below
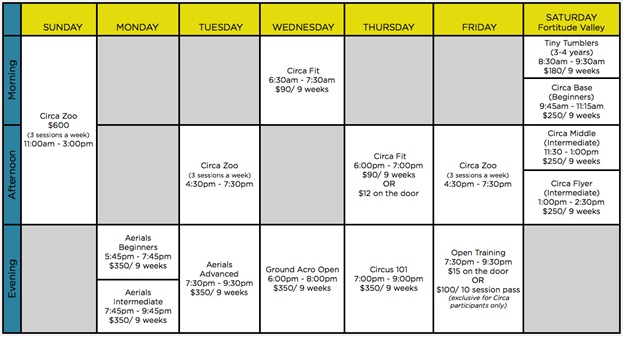
Figure: Time table
Step 1
Create 8 columns 7 rows table and enter the names of the days in row 1 starting from column 2
Step 2
Merge the following cells
Sunday Column
- Column 2 row 2 to column 2 row 5
- Column 2 row 6 to column 2 row 7
Monday Column
- Column 3 row 2 to column 3 row 3
- Column 3 row 4 to column 3 row 5
Tuesday Column
- Column 4 row 2 to column 4 row 3
- Column 4 row 4 to column 4 row 5
- Column 4 row 6 to column 4 row 7
Wednesday Column
- Column 5 row 2 to column 5 row 3
- Column 5 row 4 to column 5 row 5
- Column 5 row 6 to column 5 row 7
Thursday Column
- Column 6 row 2 to column 6 row 3
- Column 6 row 4 to column 6 row 5
- Column 6 row 6 to column 6 row 7
Friday Column
- Column 7 row 2 to column 7 row 3
- Column 7 row 4 to column 7 row 5
- Column 7 row 6 to column 7 row 7
Saturday Column
Column 8 row 6 to column 8 row 7
Step 3
Color the appropriate cells
Step 4
Set the text direction for the texts in column 1
Writing Formula in table cell
You can use word document to write simple formula in table cell. To add formula to a cell follow the steps below:
- Click in the cell you want to write the formula
- Click on the Layout tab
- Click on formula
- Type the formula in the formula box after the = sign using the table cell numbers - Alphabets for columns and numbers for rows.
Examples
Column 1 is A, column 2 is B, column 3 is C etc. Therefore column 1 row 1 will be A1, column 2 row 1 will be B1, column 1 row 2 will be A2 and column 2 row 2 will be B2 etc.
Examples
If you want to add column 1 row 2 (A2) and column 2 row 2 (B2) and place the result in column 3 row 2 (C2),
you can write any of these in the formula box while the cursor in cell C2:
=sum(A2,B2) or =A2+B2 or =sum(LEFT)
You can use positional arguments (LEFT, RIGHT, ABOVE, BELOW) with these functions:
- AVERAGE
- COUNT
- MAX
- MIN
- PRODUCT
- SUM
Usage of the above formula
AVERAGE - Finds the average of the numbers
COUNT - count how many numbers are in cells
MAX - finds the maximum number
MIN - finds the minimum number
PRODUCT - finds the result of the multiplication of the numbers
SUM - adds the numbers
Updating formula field
After making changes to a value in table cell, word doesn't automatically update the result in the formula cell. You have to select the value and right-click on the value and select Update Field
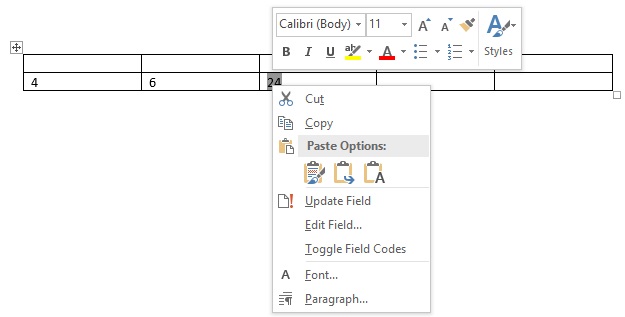
Figure: Update formula value
Writing a CV
- Use table for the personal information, educational background, work experience and or references
- Remove the borders of the tables used
Writing a cover letter
- Your address and date at the left
- Followed by the recipient's address at the left.
- Salutation/greeting e.g. Dear Hiring Manager, or name of the manager if you know
- Title of the letter bold, centered and in capital blocks
- Content of the letter
- Complimentary close e.g. Yours Sincerely,
- Signature space