Course Overview and Website Structure & Hosting
- Website name
- Hosting
- Website Design Tools
- Creating your first website
- Basic HTML Content
- Introduction to CSS
- Types of styles (Internal, External & Inline Styles)
- Adding a paragraph and an image to a page
WEBSITE
A website (also written as web site) is a collection of web pages and related content that is identified by a common domain name and published on at least one web server. Notable examples are wikipedia.org, google.com, amazon.com, facebook.com & kuulchat.com.
All publicly accessible websites collectively constitute the World Wide Web (w.w.w).There are also private websites that can only be accessed on a private network,such as a company's internal website for its employees.
Website sare typically dedicated to a particular topic or purpose, such as news,education, commerce, entertainment, or social networking. Hyperlinking between web pages guides the navigation of the site, which often starts with a homepage.
Users can access websites on a range of devices, including desktops, laptops,tablets, and smartphones. The software application used on these devices is called a web browser
WEBSITE NAME &HOSTING
A domain name is an identification string that defines a realm of administrative autonomy, authority or control within the Internet.
Every website which needs to be available online must have a unique name. This name is called domain name. There can’t be more than one domain name. You have to check with a domain name register if your desired domain name is available or taken. You can use godaddy.com to check if your desired domain name is available. You simply have to type the name of your desired domain name in the search box and hit the button. You will be informed if the entered name is available or not.
A domain name is used for finding and identifying computers on the Internet.Computers use IP addresses, which are a series of number. However, it is difficult for humans to remember strings of numbers. Because of this, domain names were developed and used to identify entities on the Internet rather than using IP addresses.
A domain name can be any combination of letters and numbers, and it can be used in combination of the various domain name extensions, such as .com, .net,.org and more.
The domain name must be registered before you can use it. Every domain name is unique. No two websites can have the same domain name. If someone types in www.yourdomain.com, it will go to your website and no one else's.
The price of a domain name typically runs between $15-25 per year.
A domain name is an essential part of having a website, but it's only part of the equation. In order to launch a website, you'll also need content and a hosting service (hosting) to store your files so they can be accessed on the internet. Remember that owning a domain does not mean hosting is also included. You can contact Kuulchat Media (kuulchatmedia.com) to purchase an affordable hosting package.
Web Design Tools
There are a number of web design tools and editors. We will be using only an editor(notepad++) to create our website from scratch. There are some tools and website you can use templates to design your website. This course is meant for you to design your own website and have good knowledge to maintain others websites.
Installing Notepad++
You can their visit, https://notepad-plus-plus.org/ to download the notepad++.
Figure:Notepad++ editor
Creating Your First Website
Many website projects have these folders in the project folder:
- images (This is to store the images that will be used on the page)
- css (This is to store the stylesheets)
- js (This is to store the javascript files)
Thus a website project folder may look like this:
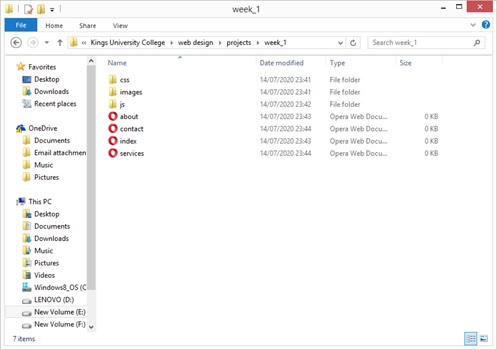
Figure: Website project folder
In order for you to fully benefit from this course, I will recommend you save your website projects in a folder named by the week of the course for easy reference of example codes.
As you can see in the project folder, I have week_1 folder in a folder I have named projects. This is where I will be saving this week examples.This will make it easier for me to access a particular page for reference.
Web pages are normally named with the html extension (.html). At the moment we will not be using PHP script until week 8 so we won’t need a web server to run our pages. You only need a web browser installed on your machine. Once you save a file with the .html extension, the default browser on your machine icon appears beside the file. As you can see in the above figure, Opera mini is the default browser on my machine and as such the computer recognizes as the appropriate software to open the file.
The home page (The first page shown when you visit a website) is named as index.html or index.php for a page with php script.
You can either use (Ctr + N) for creating new file on notepad++ or file → new
To save your file for the first time (naming your file), you can either use (Ctr + Alt + S) or file→ Save As
Openyour notepad++ and create a new file in week 1 folder as shown above and name the file as index.html.
When saving your file for the first time, you will have to browse to the folder where you want to save your file.
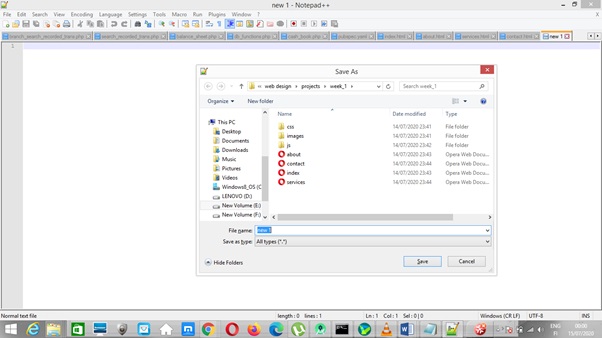
Figure: Saving file the first time
Basic HTML Content
<!DOCTYPE html>
<html>
<head>
<title>HTMLTutorial from Kuulchat.com</title>
<link rel ="icon" type="image/png"sizes="192x192" href="images/logo.png"/>
<metaname="viewport"content ="width=device-width,initial-scale=1"/>
<metaname ="description"content="Websitedescription comes here " />
<metaname ="keywords"content ="Keywordsfor website comes here " />
<linkhref ='css/style.css'rel ='stylesheet' type ='text/css'/>
<style>
</style>
<script src="js/jquery.js"></script>
</head>
<body>
</body>
</html>
Figure: The HTML Basic content
The above is the HTML basic content.
The html tag starts with a < and then the tag name and closes with a >
When a tag is opened with an exception of few tags, it must be closed. When adding children tags to the mother tag, it is advisable to indent (use the tab key to leave a space before typing the child tags). This will make it easier for you to understand your code and easily correct errors.
Figure: Tab key
The tag is closed as </element name> Thus
<Mother>
<child></child>
</Mother>
The overall mother tag is html which has the head and body as children. Thus:
<html>
<head>
</head>
<body>
</body>
</html>
The head also has the following children:
<title></title>
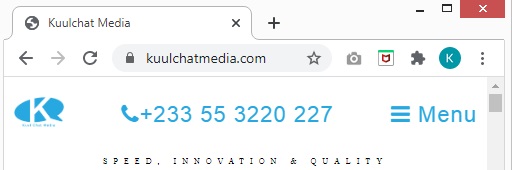
The title tag is used to write a text on the tab of the browser. The following are examples:

Figure: Facebook title
(8) Facebook produces the (8) Facebook you see in the image above
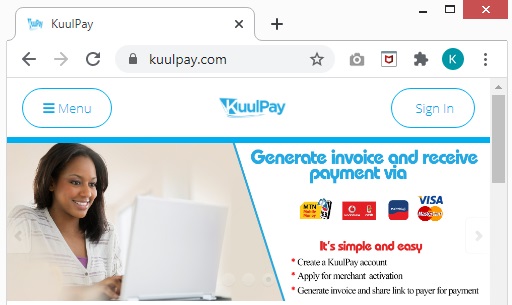
What will be the code for the following page titles?
1.
2.
Answers
1.Kuulchat Media
2.KuulPay
Link tag
There are a number of link tags in the head. It has the link (href) where there source can be found and the type of resource that can be found. For instance,in the above basic html content,
<link rel ="icon"type="image/png"sizes="192x192"href="images/logo.png"/>
Is used to show an icon for the website. The icon is a small image that is seen atthe left side of the title text on the browser tab.
The href is a path where the image can be found. As you can see the path is images/logo.png. Which means there is an image by name logo.png in the images folder in the project.
<link href ='css/style.css' rel ='stylesheet' type ='text/css' />
Is used to add external stylesheets to the page. We will briefly discuss stylesheet in this week. The href here too indicate the path where the stylesheet file can be found. As you can see the path is css/style.css. Which means there is a file by name style.css in the css folder in the project.
Meta tag
The meta tag is mainly used for search engine optimization (SEO). So search engines can link your site to people who are searching for a similar content.
The viewport meta tag
<meta name="viewport" content ="width=device-width,initial-scale=1"/>
This is an optimization for creating a mobile friendly site. We will consider developing responsive site in week 9. So hopefully you remember this tag when we come to that topic.
On high dpi screens, pages with initial-scale=1 will effectively be zoomed by browsers.Their text will be smooth and crisp, but their bitmap images will probably not take advantage of the full screen resolution.
The meta description tag
<meta name ="description" content="Website description comeshere " />
The meta description tag in HTML is the 160 character snippet used to summarize a web page’s content. Search engines sometimes use these snippets in search results to let visitors know what a page is about before they click on it.
The meta keywords tag
<meta name ="keywords" content ="Keywords for website comeshere " />
The meta keywords tag is one of several of meta tags that you can insert into your web pages to provide search engines with information about your pages that isn't visible on the page itself.
The style tag
The style tag is for writing special attributes to control the looks of certain elements (tags) on the page. The style tag in the head or the body is known as internal style.
The script tag
This is for writing a javascript either internal or by external. For external script, you will need to indicate the path to the script in the src.
The body tag
This is where the actual content of the page is placed. When you visit a site,whatever you are seeing is written in the body tag.
This week’s practice, we will use the paragraph and the image tag to create a simple website. And introduce you briefly to stylesheet.
You can create a file and name it skeleton.html and copy and paste the basic html inside. Whenever you are to create a page from scratch, you can copy and paste the basic html to the new page and start to build from this content.
Creating your first website
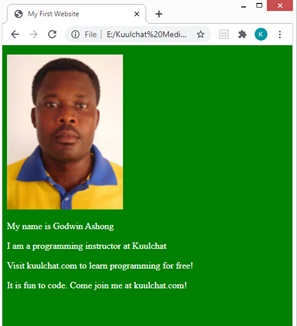
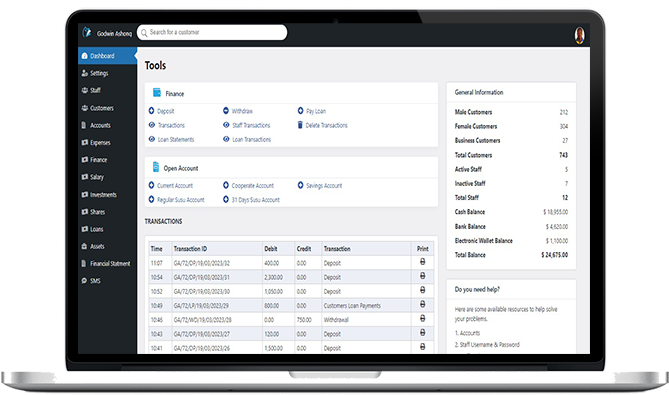
Figure: Week 1 Practice outcome
1.Create a file and name it index.html in your week_1 folder
2.Add image(s) in the images folder
3.Copy the html content in the skeleton.html file or if you haven’t created the skeleton.html file yet please do so and copy and paste the basic html tag content inside and paste in your index.html file as well
The Paragraph Tag
The p element is used for the paragraph tag.
<p>Paragraph comes here</p>
The paragraph text is placed between the p tags. As you’ve been told, the content of the page is written in the body tag. So in between the body tag, write a paragraph tag and write some text inside the paragraph tags.
In my example above, I have:
<p>My name is Godwin Ashong</p>
<p>I am a programming instructor at Kuulchat.com</p>
<p>Visit kuulchat.com to learn programming for free!</p>
<p>It is fun to code. Come join me at kuulchat.com!</p>
Give the page a title and save your work by pressing the Ctr + S or using file →S
Go to the folder where your index.html is saved. Double click on the index.html to run the page in a browser. By default, your computer will choose the default web browser. If you wish to choose a different web browser, right click on the file and select open with and choose the appropriate browser you wish to use to run your page.
Anytime you make changes, save and refresh the page.
You can refresh the page by click on the refresh icon on the browser.

Figure: The refresh icon
Theimage tag
<img src=”” width=”” />
The<img> is the image tag. It has src for indicating the path of the image and width to indicate the width of the image.
If no width is specified, the browser will use the actual width of the image.
In the above example, I have use the below tag to display my image:
<p><imgsrc="images/godwin.jpg" width="200" /></p>
The path of the image is images/godwin.jpg as you can see.This means that I have an image by name godwin.jpg in the images folder.
NOTE: Image will not show if your image path is incorrect because the browser won’t be able to seethe image.
In the images folder, only the name of the image will be should. To check the extension (e.g jpg, jpeg, png, gif) of the image, you can right click on the image file and select property.
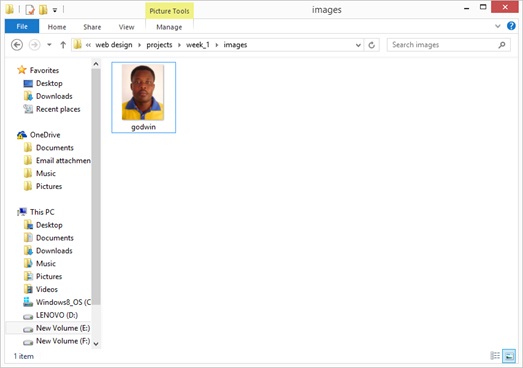
Figure: The images folder
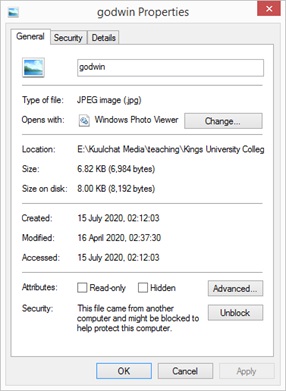
Figure: Property of an image
You can see the extension of the image in the type of file:
In the above example the extension is .jpg. As you can see in the previous images folder, the name of my image is godwin. Therefore, the complete file name of my image will be godwin.jpg. And since it is found in the images folder in the website project folder, my src path will be images/godwin.jpg.
I gave my image width of 200. You can try several width and see which one is appropriate. You can also give an image a height but it is not recommended as you may distort the image. If an image tag doesn’t have a height, the browser calculates the height itself base on the original dimension of the image so there won’t be any distortion.
Widths can also be written in terms of percentage. For instance, if you want the image to take the entire width on the screen, you can give the image a width of 100% thus,
<p><imgsrc="images/godwin.jpg" width="100%" /></p>
4. Add an image to your index.html file in a paragraph tag in the body tag. Save and refresh your page. Try several widths for the image just to see how the image looks at different widths.
5. Add some paragraphs to your index.html. Save and refresh your page.
INTRODUCTION TO STYLESHEETS
CSS stands for Cascading Style Sheets. External CSS saves a lot of work. It can control the layout of multiple web pages all at once. As explained above,external css is a stylesheet file which is included in the web page. The file is saved as .css and the styling attributes are written in that file.
For internal css, the attributes are written in the <style></style> tag mostly in the <head></head> tag. The internal css is only used on the page it is written. Unlike the external css which can be referred in multiple pages.
It is advisable to use external css since one modification will affect all pages which are referring the css. If you use internal css and you need to make modification that is common in all pages, you have to do the modifications on each of the pages and that might be tiresome.
Since you are a beginner we will be using internal stylesheet. From week 3, after learning more about stylesheet, we will only use external stylesheets.
The attribute of a tag element is style in the style sheet as below:
<style>
Element(tag name){
Attribute: value of attribute;
}
</style>
Thus the tag name then a curly bracket ({)and closes with closing curly bracket (})
In between our curly brackets, we specify the attribute and then a colon (:) and then the value of the attribute and finally a semi colon (;). The semi colon(;) is necessary if you have more attributes in the curly brackets. It separates one attribute from the other.
In this week practice, we will style the background of our page and give the paragraph tag white color as shown in the above practice outcome image.
The attribute for background is background. If we want to give the background of the body a green color, the style will therefore be:
<style>
body{
background:green;
}
</style>
The attribute for a color is color. If we want to give the paragraph a white color, we can add the below style to the style tag.
<style>
body{
background:green;
}
p{
color:white;
}
</style>
Add the above styles to the <style></style> tag in your index.html and save and refresh your page.
Hope you are able to create your first page. The complete code to my first website is:
<!DOCTYPEhtml>
<html>
<head>
<title>My FirstWebsite</title>
<link rel ="icon"type="image/png" sizes="192x192"href="images/logo.png" />
<metaname="viewport" content="width=device-width,initial-scale=1" />
<meta name="description" content="Kuulchat.com is an educational resourceportal for free online courses." />
<meta name="keywords" content ="Free online courses, programming courses,web design"/>
<link href ='css/style.css'rel ='stylesheet' type ='text/css' />
<style>
body{
background:green;
}
p{
color:white;
}
</style>
<script src="js/jquery.js"></script>
</head>
<body>
<p><img src="images/godwin.jpg" width="200"/></p>
<p>My name is Godwin Ashong</p>
<p>I am a programming instructor at Kuulchat</p>
<p>Visit kuulchat.com to learn programming for free!</p>
<p>It is fun to code. Come join me at kuulchat.com!</p>
</body>
</html>