REVISION OF CSS & HTML TAGS
- Paragraph
- Image
- Table
- List
- Div
- CSS ATTRIBUTES
- Background
- Width
- Height
- Margin
- Padding
- Font-size
- Font-weight
- Display
- Block
- Inline-block
- Div Positions
- Relative
- Absolute
- Fixed
- Classes & IDs
JAVASCRIPTS
- Introduction
- Functions
Explanations to week content
A database is a separate application that stores a collection of data. Each database has one or more distinct APIs for creating, accessing, managing, searching and replicating the data it holds.
Terminology
Database - A database is a collection of tables, with related data.
Table - A table is a matrix with data. A table in a database looks like a simple spreadsheet.
Column - One column (data element) contains data of one and the same kind, for example the column postcode.
Row - A row (= tuple, entry or record) is a group of related data, for example the data of one subscription.
Primary Key - A primary key is unique. A key value can not occur twice in one table. With a key, you can only find one row.
Foreign Key - A foreign key is the linking pin between two tables.
To use the database feature of xampp, you have to start MySQL on the xampp panel.
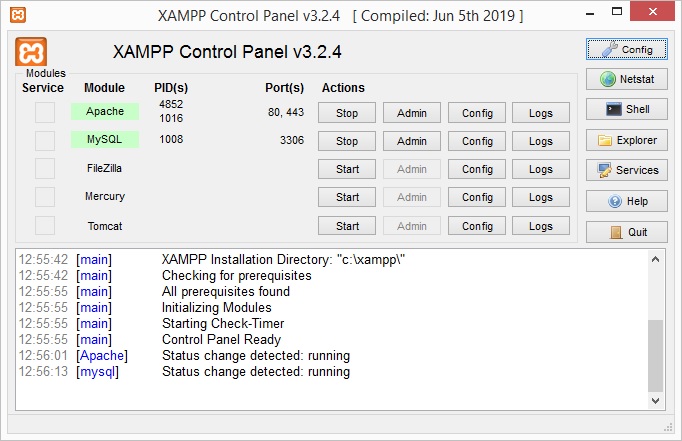
Figure: Xampp with MYSQL started
Type localhost in the browser and select the phpMyAdmin menu or on the xampp panel click on the Admin button next to stop button for the MySQL
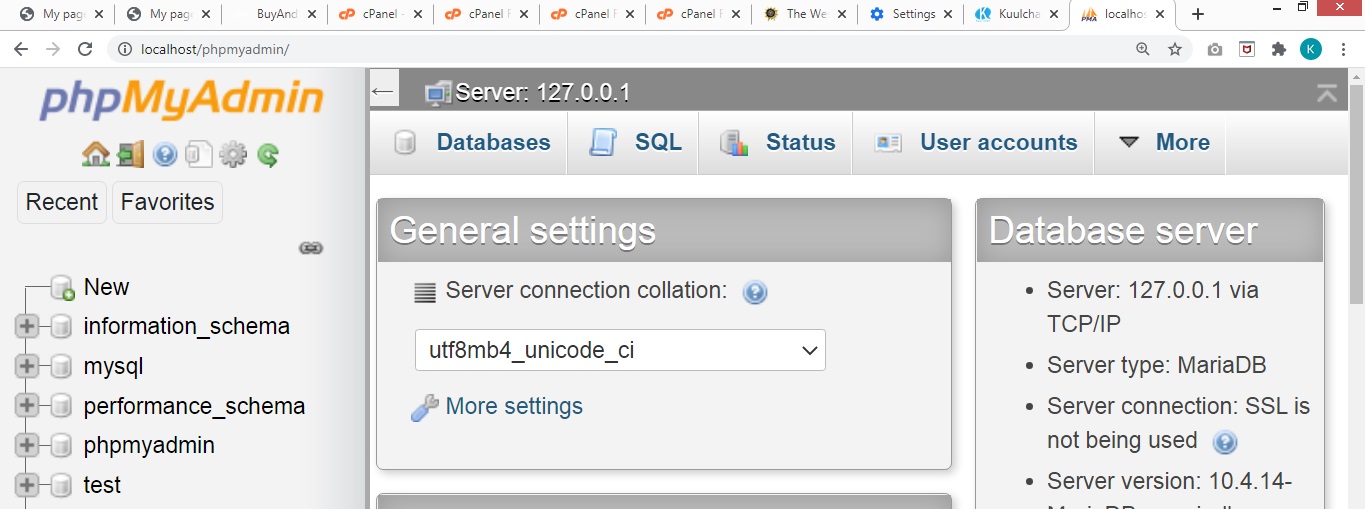
Figure: phpMyAdmin
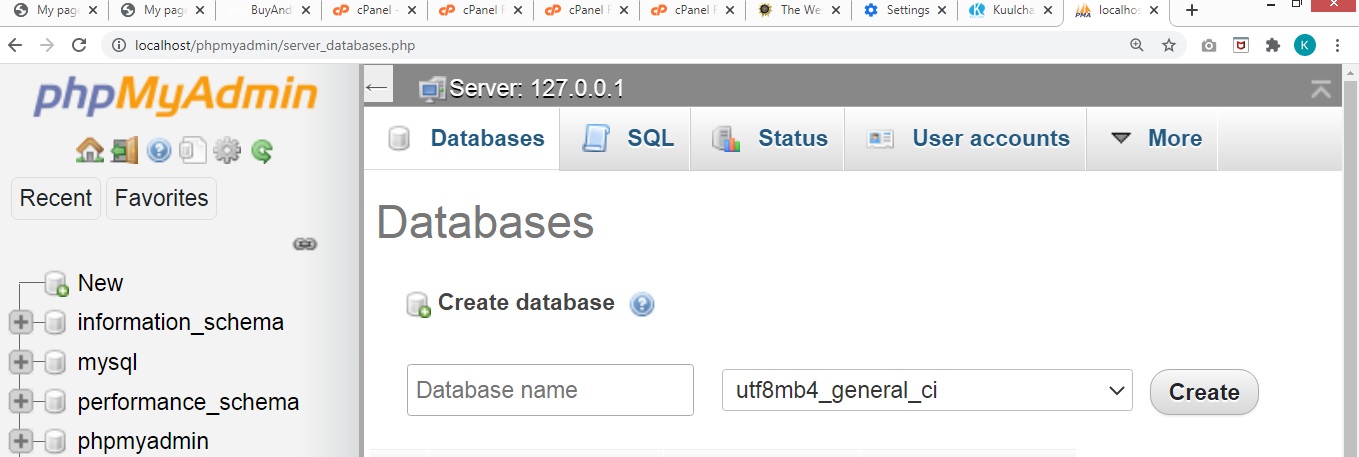
Creating Database
The database contains the tables where we store our data.
1. To create the database click on database
2. Give the database a name and click on create
You can as well create a database using sql query. You can click on the SQL tab and use the query below to create a database
CREATE DATABASE databasename;
Example
CREATE DATABASE school_db;
You drop a database using the query below:
DROP DATABASE databasename;
Example
DROP DATABASE school_db;
The data is stored in a table.
Once you've selected a database, you will see a field to create a new table.
Give the table a name and specify how many columns the table will have.
This is not a database course so we will consider few things concerning database. You have to take a database course to master the database queries for your future projects.
Specify the data type of each of the columns.
Example
Create a salaries table with 8 columns
The structure of the table is shown below:
salaries
| NAME | TYPE | DEFAULT | INDEX | A_I |
|---|---|---|---|---|
| staff | INT | |||
| amount | DOUBLE | |||
| month | INT | |||
| year | INT | |||
| token | TEXT | |||
| date | DATE | |||
| time | TIMESTAMP | CURRENT_TIMESTAMP | ||
| id | INT | PRIMARY | TICK |
NOTE:
A_I means auto increment
You can as well create a table using the sql query syntax below:
CREATE TABLE table_name (
    column1 datatype,
    column2 datatype,
    column3 datatype,
   ....
);
Example
CREATE TABLE students (
   firstname text,
   lastname text,
   picture text,
   student_id text,
   token text,
   date date,
   time timestamp NOT NULL DEFAULT CURRENT_TIMESTAMP,
  id int(11) NOT NULL AUTO_INCREMENT,
  PRIMARY KEY(`id`)
);
To drop a table use the query below:
DROP TABLE table_name;
Example
DROP TABLE students;
To delete the data inside a table, but not the table itself use the query below:
truncate table table_name;Example
truncate table students;MySQL Data Types (Version 8.0)
In MySQL there are three main data types: string, numeric, and date and time.
| Data type | Description |
|---|---|
| CHAR(size) | A FIXED length string (can contain letters, numbers, and special characters). The size parameter specifies the column length in characters - can be from 0 to 255. Default is 1 |
| VARCHAR(size) | A VARIABLE length string (can contain letters, numbers, and special characters). The size parameter specifies the maximum column length in characters - can be from 0 to 65535 |
| BINARY(size) | Equal to CHAR(), but stores binary byte strings. The size parameter specifies the column length in bytes. Default is 1 |
| VARBINARY(size) | Equal to VARCHAR(), but stores binary byte strings. The size parameter specifies the maximum column length in bytes. |
| TINYBLOB | For BLOBs (Binary Large OBjects). Max length: 255 bytes |
| TINYTEXT | Holds a string with a maximum length of 255 characters |
| TEXT(size) | Holds a string with a maximum length of 65,535 bytes |
| BLOB(size) | For BLOBs (Binary Large OBjects). Holds up to 65,535 bytes of data |
| MEDIUMTEXT | Holds a string with a maximum length of 16,777,215 characters |
| MEDIUMBLOB | For BLOBs (Binary Large OBjects). Holds up to 16,777,215 bytes of data |
| LONGTEXT | Holds a string with a maximum length of 4,294,967,295 characters |
| LONGBLOB | For BLOBs (Binary Large OBjects). Holds up to 4,294,967,295 bytes of data |
| ENUM(val1, val2, val3, ...) | A string object that can have only one value, chosen from a list of possible values. You can list up to 65535 values in an ENUM list. If a value is inserted that is not in the list, a blank value will be inserted. The values are sorted in the order you enter them |
| SET(val1, val2, val3, ...) | A string object that can have 0 or more values, chosen from a list of possible values. You can list up to 64 values in a SET list |
| Data type | Description |
|---|---|
| BIT(size) | A bit-value type. The number of bits per value is specified in size. The size parameter can hold a value from 1 to 64. The default value for size is 1. |
| TINYINT(size) | A very small integer. Signed range is from -128 to 127. Unsigned range is from 0 to 255. The size parameter specifies the maximum display width (which is 255) |
| BOOL | Zero is considered as false, nonzero values are considered as true. |
| BOOLEAN | Equal to BOOL |
| SMALLINT(size) | A small integer. Signed range is from -32768 to 32767. Unsigned range is from 0 to 65535. The size parameter specifies the maximum display width (which is 255) |
| MEDIUMINT(size) | A medium integer. Signed range is from -8388608 to 8388607. Unsigned range is from 0 to 16777215. The size parameter specifies the maximum display width (which is 255) |
| INT(size) | A medium integer. Signed range is from -2147483648 to 2147483647. Unsigned range is from 0 to 4294967295. The size parameter specifies the maximum display width (which is 255) |
| INTEGER(size) | Equal to INT(size) |
| BIGINT(size) | A large integer. Signed range is from -9223372036854775808 to 9223372036854775807. Unsigned range is from 0 to 18446744073709551615. The size parameter specifies the maximum display width (which is 255) |
| FLOAT(size, d) | A floating point number. The total number of digits is specified in size. The number of digits after the decimal point is specified in the d parameter. This syntax is deprecated in MySQL 8.0.17, and it will be removed in future MySQL versions |
| FLOAT(p) | A floating point number. MySQL uses the p value to determine whether to use FLOAT or DOUBLE for the resulting data type. If p is from 0 to 24, the data type becomes FLOAT(). If p is from 25 to 53, the data type becomes DOUBLE() |
| DOUBLE(size, d) | A normal-size floating point number. The total number of digits is specified in size. The number of digits after the decimal point is specified in the d parameter |
| DOUBLE PRECISION(size, d) | |
| DECIMAL(size, d) | An exact fixed-point number. The total number of digits is specified in size. The number of digits after the decimal point is specified in the d parameter. The maximum number for size is 65. The maximum number for d is 30. The default value for size is 10. The default value for d is 0. |
| DEC(size, d) | Equal to DECIMAL(size,d) |
Note: All the numeric data types may have an extra option: UNSIGNED or ZEROFILL. If you add the UNSIGNED option, MySQL disallows negative values for the column. If you add the ZEROFILL option, MySQL automatically also adds the UNSIGNED attribute to the column.
| Data type | Description |
|---|---|
| DATE | A date. Format: YYYY-MM-DD. The supported range is from '1000-01-01' to '9999-12-31' |
| DATETIME(fsp) | A date and time combination. Format: YYYY-MM-DD hh:mm:ss. The supported range is from '1000-01-01 00:00:00' to '9999-12-31 23:59:59'. Adding DEFAULT and ON UPDATE in the column definition to get automatic initialization and updating to the current date and time |
| TIMESTAMP(fsp) | A timestamp. TIMESTAMP values are stored as the number of seconds since the Unix epoch ('1970-01-01 00:00:00' UTC). Format: YYYY-MM-DD hh:mm:ss. The supported range is from '1970-01-01 00:00:01' UTC to '2038-01-09 03:14:07' UTC. Automatic initialization and updating to the current date and time can be specified using DEFAULT CURRENT_TIMESTAMP and ON UPDATE CURRENT_TIMESTAMP in the column definition |
| TIME(fsp) | A time. Format: hh:mm:ss. The supported range is from '-838:59:59' to '838:59:59' |
| YEAR | A year in four-digit format. Values allowed in four-digit format: 1901 to 2155, and 0000. MySQL 8.0 does not support year in two-digit format. |
The UNIQUE constraint ensures that all values in a column are different.
Both the UNIQUE and PRIMARY KEY constraints provide a guarantee for uniqueness for a column or set of columns.
A PRIMARY KEY constraint automatically has a UNIQUE constraint.
However, you can have many UNIQUE constraints per table, but only one PRIMARY KEY constraint per table.
The following SQL creates a UNIQUE constraint on the "id" column when the "persons" table is created:
CREATE TABLE persons (
    firstname varchar(255) NOT NULL,
    lastname varchar(255),
    age int,
    id int NOT NULL
    UNIQUE (id)
);
The PRIMARY KEY constraint uniquely identifies each record in a table.
Primary keys must contain UNIQUE values, and cannot contain NULL values.
A table can have only ONE primary key; and in the table, this primary key can consist of single or multiple columns (fields).
SQL PRIMARY KEY on CREATE TABLE
The following SQL creates a PRIMARY KEY on the "id" column when the "persons" table is created:
CREATE TABLE persons (
    firstname varchar(255) NOT NULL,
    lastname varchar(255),
    age int,
    id int NOT NULL,
    PRIMARY KEY (id)
);
To allow naming of a PRIMARY KEY constraint, and for defining a PRIMARY KEY constraint on multiple columns, use the following SQL syntax:
CREATE TABLE persons (
    firstname varchar(255) NOT NULL,
    lastname varchar(255),
    age int,
    id int NOT NULL,
    CONSTRAINT pk_person PRIMARY KEY (id,lastname)
);
Note: In the example above there is only ONE PRIMARY KEY (pk_person). However, the VALUE of the primary key is made up of TWO COLUMNS (id + lastname).
SQL FOREIGN KEY Constraint
A FOREIGN KEY is a key used to link two tables together.
A FOREIGN KEY is a field (or collection of fields) in one table that refers to the PRIMARY KEY in another table.
The table containing the foreign key is called the child table, and the table containing the candidate key is called the referenced or parent table.
Look at the following two tables:
"persons" table:
| firstname | Lastname | age | id |
|---|---|---|---|
| Godwin | Ashong | 20 | 1 |
| Joseph | Tetteh | 25 | 2 |
| Mary | Agbovi | 21 | 3 |
"orders" table:
| person_id | order_number | id |
|---|---|---|
| 1 | 77895 | 1 |
| 3 | 44678 | 2 |
| 2 | 22456 | 3 |
| 3 | 24562 | 4 |
Notice that the "person_id" column in the "orders" table points to the "id" column in the "persons" table.
The "id" column in the "persons" table is the PRIMARY KEY in the "persons" table.
The "person_id" column in the "orders" table is a FOREIGN KEY in the "orders" table.
The FOREIGN KEY constraint is used to prevent actions that would destroy links between tables.
The FOREIGN KEY constraint also prevents invalid data from being inserted into the foreign key column, because it has to be one of the values contained in the table it points to.
SQL FOREIGN KEY on CREATE TABLE
The following SQL creates a FOREIGN KEY on the "person_id" column when the "orders" table is created:
CREATE TABLE orders (
    person_id int,
    order_number int NOT NULL,
    id int NOT NULL,
    PRIMARY KEY (id),
    FOREIGN KEY (person_id) REFERENCES persons(id)
);
Auto-increment allows a unique number to be generated automatically when a new record is inserted into a table.
Often this is the primary key field that we would like to be created automatically every time a new record is inserted.
The following SQL statement defines the "id" column to be an auto-increment primary key field in the "lecturers" table:
CREATE TABLE lecturers (
    firstname varchar(255) NOT NULL,
    lastname varchar(255) NOT NULL,
    picture text,
    email text,
    password text,
    date_of_birth date,
    token text,
    id int NOT NULL AUTO_INCREMENT,
    PRIMARY KEY (id)
);
MySQL uses the AUTO_INCREMENT keyword to perform an auto-increment feature.
By default, the starting value for AUTO_INCREMENT is 1, and it will increment by 1 for each new record.
To let the AUTO_INCREMENT sequence start with another value, use the following SQL statement:
ALTER TABLE Persons AUTO_INCREMENT=100;
To insert a new record into a table, you don't have to specify the value of the AUTO_INCREMENT field.
Inserting into table
To insert a new record into a table, use the syntax below:
insert into table_name(column_1,column_2,column_3,...) values(value_1,value_2,value_3,...)
Note: For a varchar, text and date data types, you have to put the values in a single quotation ('').
Example
insert into persons(firstname,lastname,token) values('Godwin','Ashong','xabssead20');
To insert the current date into a date field, you can use CURDATE() keyword as your value.
Example
insert into persons(firstname,lastname,token,date) values('Joseph','Mensah','basiad230bxAbc',CURDATE());
Selecting from a table
To select all rows from a table use the syntax below:
select * from table_name;
NOTE: * means everything so the above syntax is read select everything from table_name
Example
select * from persons;
The above sql query fetches all the rows in the persons table
Selecting with a condition
To select specific field(s) you must use a conditional clause after the where keyword.
Sql Syntax:
select * from table_name where ...
For instance to fetch a person from the persons table with the token basiad230bxAbc , the query below can be written:
select * from persons where token = 'basiad230bxAbc';
You can join two clauses together using the AND keyword.
Example
select * from persons where date >='2021-03-01' and id !=5
NOTE:
>= means greater than or equal to. If only greater than the > is used and if only equal to the = is used.
!= means not equal to
Date in tables are entered in the YYYY-MM-DD format, thus year-month-day.
The or clause can also be used to fetch a row which matches at least one of the conditions.
Example
select * from persons where date='2021-03-01' or date = '2021-03-05'
You can as well select only specific columns by stating the column(s) name(s) instead of using the *
Example
select firstname,lastname from persons where date='2021-03-01'
The above query will only fetch the firstname, lastname columns from the row that matches the condition (Thus date being 2021-03-01)
Updating a column
To update a column use the syntax below:
update table_name set column_1 = value, column_2 = value, ...
To update a row that meets a particular condition you have to use the where clause.
Example
update persons set firstname='Moses', lastname='Adjetey' where token = 'basiad230bxAbc';
The above query will set the firstname column to Moses, the lastname column to Adjetey for the row that has the token value being basiad230bxAbc
NOTE:
If you don't specify a where clause when you are updating a table, all the rows of the table will be updated.
Example
update persons set firstname='Moses', lastname='Adjetey'
The above query will set the firstname column to Moses and lastname column to Adjetey for all the rows in the table since there was no where clause to indicate which row(s) to update
Deleting from table
To delete row(s) from a table use the query below:
delete from table_name where ...;For instance to delete from the persons table for the row which has the token basiad230bxAbc, the following query could be written.
delete from persons where token = 'basiad230bxAbc'MYSQL PHP SCRIPT
To insert, select or update a table using a php script, you first must connect to the database. To connect to a database, use the syntax below:
$con = mysqli_connect("host name comes here","database username comes here","database password comes here","database name comes here");
HOST NAME
If the database is on the same server as your script, the host name will be localhost but if the database is on an external server (remote server) you have to specify the public static ip address or domain name where the database is located.
For xampp, since our database is on the same machine as our script the host name will be localhost
The mysqli_connect returns true or false so you can check if the connection is successful or not using the if condition. In the above syntax, the $con variable will either contain true if condition is successful or false if the condition is not successful. So to check if connection is successful, you can use the script below:
if($con){
     echo "Connected !";
}else{
     echo "Database connection failed!";
}
DATABASE USERNAME AND PASSWORD
Xampp database has root as a username and no password for a default database user details. If you haven't created a new user in your phpMyAdmin and assign to a database, you can use the default database user.
Thus for the default:
username = root and password is empty.
Therefore if our database name is school_db, we can write our connection script below:
$con = mysqli_connect("localhost","root","","school_db");To insert, update or delete from a table, you have to write the sql query string and pass it to the mysqli_query function in the syntax below:
mysqli_query($con,$sql);
Where the $con is the connection variable as explained above and the $sql is the string variable of the sql query.
The mysqli_query returns true for a successful execution and false when it failed. You can therefore check if the execution is successful or not using the if condition similar to the syntax below:
if(mysqli_query($con,$sql)){
   //Execution is successful do something
}else{
   // Execution failed so do something
}
NOTE:
You can create the sql string using the concept of joining of string. Remember to put the text, varchar and date data types of the table in a single quotation ('').
Practical example
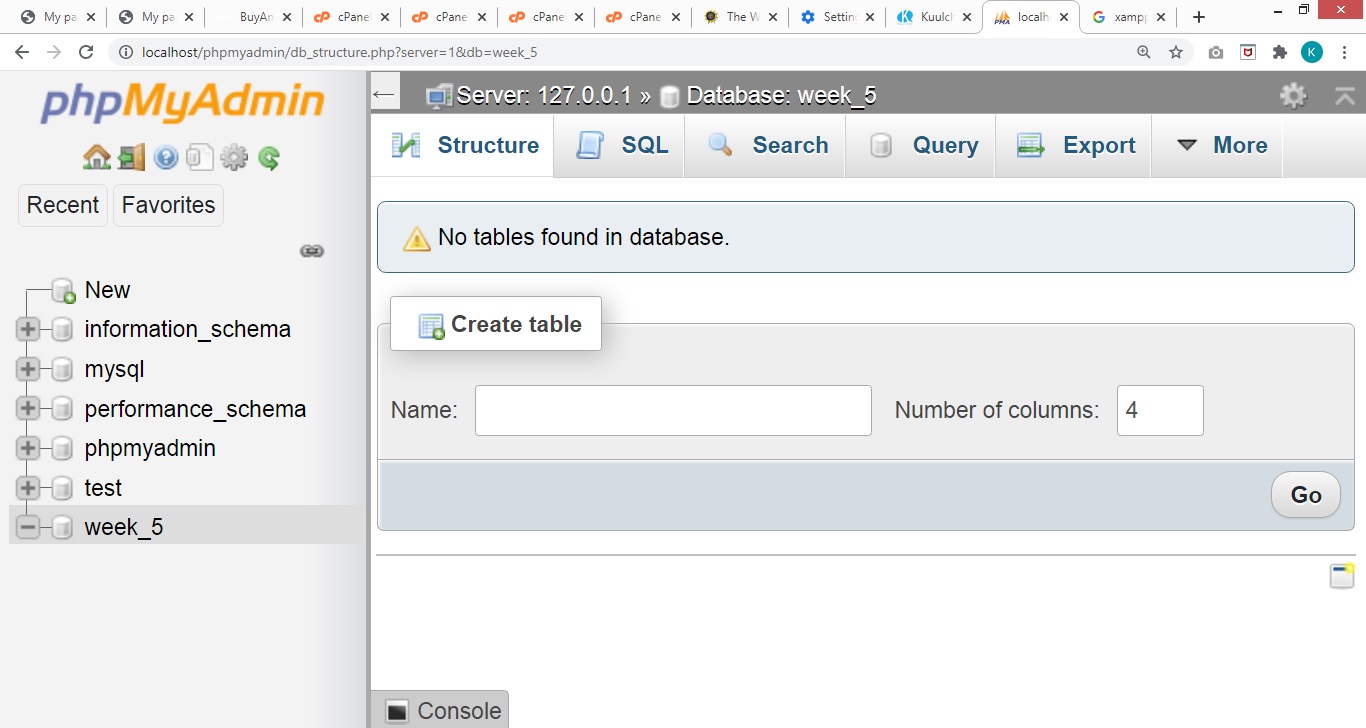
Create a database by name week_5 and create a table in the phpMyAdmin called students having first name, last name, student id, date of birth, token, date , time which is of the data type timestamp and set to current_timestamp and id which is auto increment and primary key.
Write a script to achieve the following:
1. Insert the first name, last name, date of birth, token and date of entry into the database
2. Update the date of birth using any of the entered token values
3. Delete any of the entries using any of the entered token values
Solution
Query to create table
CREATE TABLE students (
   firstname text,
   lastname text,
   student_id text,
   date_of_birth date,
   token text,
   date date,
   time timestamp NOT NULL DEFAULT CURRENT_TIMESTAMP,
  id int(11) NOT NULL AUTO_INCREMENT,
  PRIMARY KEY(`id`)
);
Php Script
<?php
$con = mysqli_connect("localhost","root","","week_5");
if(!$con){
?>
	<p>Could not connect to database</p>
<?php
}else{
?>
	<p>Connected to database</p>
<?php
}
/* Insert into database */
$fn = "Godwin";
$ln = "Ashong";
$student_id = "010002021";
$token = "4db123bcv4f";
$date_of_birth = "1990-03-01";
$sql = "insert into students(firstname,lastname,student_id,date_of_birth,token,date) values
(
'".$fn."',
'".$ln."',
'".$student_id."',
'".$date_of_birth."',
'".$token."',
CURDATE()
)
";
if(mysqli_query($con,$sql)){
?>
	<p><?php echo $fn." ".$ln;?> successfully added</p>
<?php
}else{
?>
	<p>Failed to add student. Please try again later.</p>
<?php
}
$fn = "Joseph";
$ln = "Mensah";
$student_id = "010012021";
$token = "5db103bcv4f";
$date_of_birth = "1995-03-01";
$sql = "insert into students(firstname,lastname,student_id,date_of_birth,token,date) values
(
'".$fn."',
'".$ln."',
'".$student_id."',
'".$date_of_birth."',
'".$token."',
CURDATE()
)
";
if(mysqli_query($con,$sql)){
?>
	<p><?php echo $fn." ".$ln;?> successfully added</p>
<?php
}else{
?>
	<p>Failed to add student. Please try again later.</p>
<?php
}
$fn = "Mary";
$ln = "Kpogo";
$student_id = "010022021";
$token = "dftdb203bcv4f";
$date_of_birth = "1996-03-01";
$sql = "insert into students(firstname,lastname,student_id,date_of_birth,token,date) values
(
'".$fn."',
'".$ln."',
'".$student_id."',
'".$date_of_birth."',
'".$token."',
CURDATE()
)
";
if(mysqli_query($con,$sql)){
?>
	<p><?php echo $fn." ".$ln;?> successfully added</p>
<?php
}else{
?>
	<p>Failed to add student. Please try again later.</p>
<?php
}
/* Updating date of birth for Mary Kpogo */
$sql = "update students set date_of_birth='2000-01-03' where token='dftdb203bcv4f'";
if(mysqli_query($con,$sql)){
?>
	<p>Student information successfully updated</p>
<?php
}else{
?>
	<p>Failed to update student information. Please try again later.</p>
<?php
}
/* Delete Joseph Mensah from record */
$sql = "delete from students where token='5db103bcv4f'";
if(mysqli_query($con,$sql)){
?>
	<p>Student information successfully deleted</p>
<?php
}else{
?>
	<p>Failed to delete student information. Please try again later.</p>
<?php
}
?>For successful queries which produce a result set, such as SELECT, mysqli_query will return a mysqli_result object.
You will have to store the result in a variable and then use a while loop to iterate through each of the rows of the results.
Thus:
Store the result
Syntax
$query = mysqli_query($con,$sql);
Step 2
Iterate through each of the array results
Syntax
while($row=mysqli_fetch_array($query)){
}
Step 3
Get each of the columns for each of the rows in the iteration by their column name
Example
while($row=mysqli_fetch_array($query)){
  $fn = $row['firstname'];
  $ln = $row['lastname'];
}
Step 4
Display or process or store in an array the fetched information
Displaying Fetched Information
Practical Example
Fetch the stored students information and display the rows recorded in the students table
 <?php
/* Connect to database */
$con = mysqli_connect("localhost","root","","week_5");
?>
<table width="100%" border="1">
	<th>First Name</th>
	<th>Last Name</th>
	<th>Student Id</th>
	<th>Date Of Birth</th>
	<?php
	/* Step 1 -> Store the row objects using the mysqli_query with con and sql variables as paramters */
	$sql = "select * from students";
	$query = mysqli_query($con,$sql);
	/* loop through each of the rows using the while loop and myseli_fetch_array function with the $query object as a parameter */
	while($row=mysqli_fetch_array($query)){
		/* Get each of the column value for each row by the column name */
		$fn = $row['firstname'];
		$ln = $row['lastname'];
		$student_id = $row['student_id'];
		$date_of_birth = $row['date_of_birth'];
		?>
		<tr>
			<td><?php echo $fn;?></td>
			<td><?php echo $ln;?></td>
			<td><?php echo $student_id;?></td>
			<td><?php echo $date_of_birth;?></td>
		</tr>
		<?php
	}
	?>
</table>
Storing each of the rows in an array
Write a function which returns the students information in an array.
Solution
1. Create an array by name students and store each of the rows in the array
2. return the array variable.
PHP Script
<?php
function students(){
	/* Connect to database */
	$con = mysqli_connect("localhost","root","","week_5");
	$students = array();
	/* Step 1 -> Store the row objects using the mysqli_query with con and sql variables as paramters */
	$sql = "select * from students";
	$query = mysqli_query($con,$sql);
	/* loop through each of the rows using the while loop and myseli_fetch_array function with the $query object as a parameter */
	while($row=mysqli_fetch_array($query)){
		/* Store each of the rows in the students array */
		array_push($students,$row);
	}
        /* Return array */
	return $students;
}
?>
Calling the data function and iterating through each array content
Call the students function and display the content
The Complete PHP Script
<?php
function students(){
	/* Connect to database */
	$con = mysqli_connect("localhost","root","","week_5");
	$students = array();
	/* Step 1 -> Store the row objects using the mysqli_query with con and sql variables as paramters */
	$sql = "select * from students";
	$query = mysqli_query($con,$sql);
	/* loop through each of the rows using the while loop and myseli_fetch_array function with the $query object as a parameter */
	while($row=mysqli_fetch_array($query)){
		/* Store each of the rows in the students array */
		array_push($students,$row);
	}
	return $students;
}
/* Call the students function */
$students = students();
/* Check if array has a content. If no content, it means no result */
if(count($students)>0){
?>
	<table border="1">
		<th>First Name</th>
		<th>Last Name</th>
		<th>Student ID</th>
		<th>Date Of Birth</th>
		<?php
		foreach($students as $student){
		?>
			<tr>
				<td><?php echo $student['firstname'];?></td>
				<td><?php echo $student['lastname'];?></td>
				<td><?php echo $student['student_id'];?></td>
				<td><?php echo $student['date_of_birth'];?></td>
			</tr>
		<?php
		}
		?>
	</table>
<?php
}else{
	/* Inform user that there's no result */
?>
	<p>No student on record</p>
<?php
}
To close a database connection variable, the syntax below is used:
mysqli_close ($con);
To get the last inserted id, the syntax below is used:
$id = mysqli_insert_id($con);
In our final project, we will have all database related functions in a database class that we will write and non-database related functions in another class.
Our database class will look something like this.
<?php
class DB{
private $fns;
public function __construct($fns){
$this->fns = $fns;
}
/* Database Connectivity */
function db_host(){
return "localhost";
}
function db_username(){
return "root";
}
function db_password(){
return '';
}
function db_name(){
return "test";
}
function db_connect(){
$con = mysqli_connect($this->db_host(),$this->db_username(),$this->db_password(),$this->db_name());
return $con;
}
function db_close($con){
mysqli_close ($con);
}
}
?>
The $fns variable is an object for the non-database related functions class which we may need in some of the functions in the database class.
Anytime we want to create a connection variable we will call the db_connect() function and anytime we want to close the connection we will call db_close() function
Assignment
1. Create a database for books
2. Write the php script to insert a book, select a particular book, update a particular book record, delete a particular book and display the books on record


Digital Address: GZ-033-0057
King Kotey Road
Teshie - Accra
Ghana
+233 59 993 7122
Finland
+358 44 986 0934
info@kuulchat.com
![]()
© Copyright 2015 - 2024
All Rights Reserved