Getting started
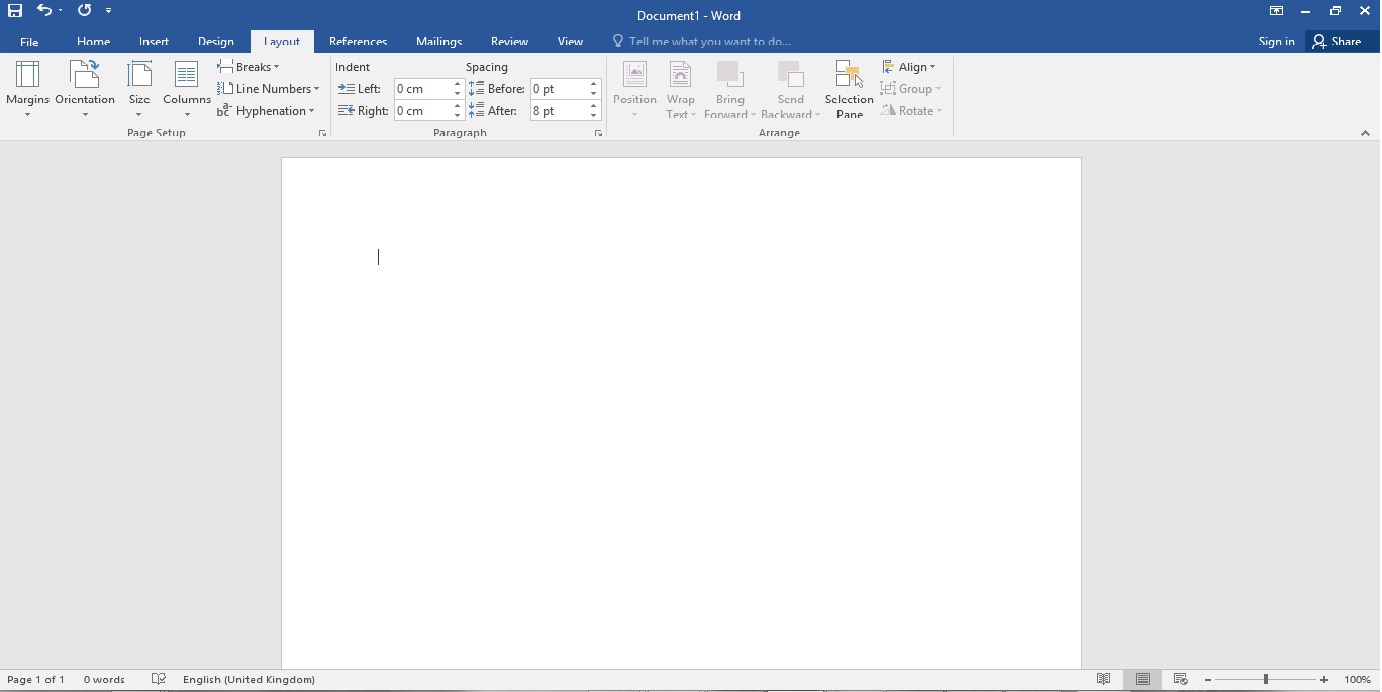
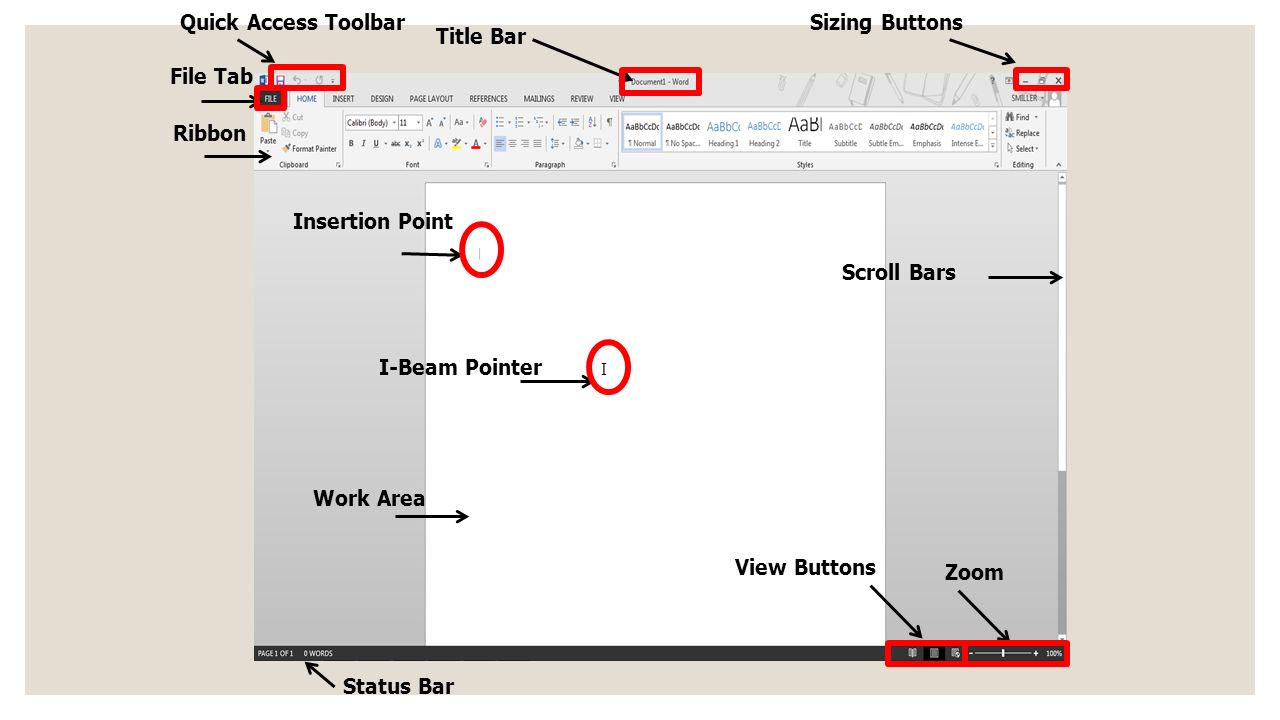
Figure: Microsoft word
Microsoft Word is a word processor developed by Microsoft.
Microsoft native file formats are denoted either by a .doc or .docx filename extension.
The .docx is the newer extension for word 2007 and later for Windows and Word 2008 and later for MacOS.
Starting Microsoft Word
- Click on the windows icon at the taskbar or the keyboard for the start screed
- Search word
- Click on the search result that shows to start the Microsoft word application
Opening a word document
- Navigate to the folder where the word document file is located
- Double click on the file to open the word document
Parts of Microsoft Word
Entering text
To enter a text follow the steps below:
- Move the cursor to the appropriate position you wish to enter the text
- Click that position
- The insertion cursor appears in that position.
- Place your fingers at the appropriate positions
- Type your text by pressing the appropriate keyboards.
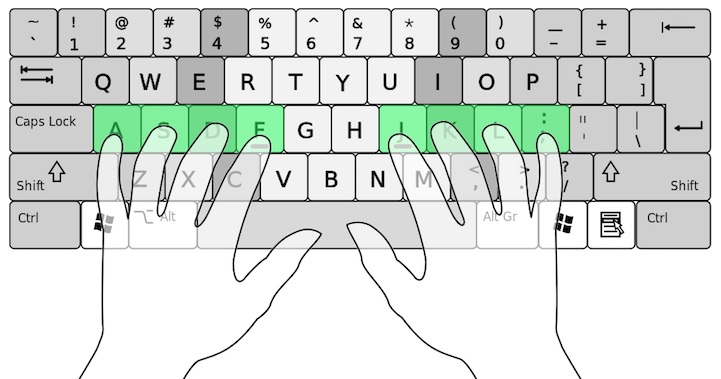
Figure: Finger placement on the keyboard
Saving document the first time
- Click on the File menu at the top
- Select Save As
- Click on Browse
- Navigate to where you wish to save your document
- Enter the name of the document in the File name: field
- Click on save
Saving changes done
If you've already saved your document to the computer as explained above or probably a word document you opened and made changes to it, to save simply follow any of the steps below:
Method one
- Click on the File menu
- Select Save
Method two
Simply press ctrl + S to save the document
Method three
Click on the save icon at the top left.

Figure: Save icon
Closing document
To close a document, simply click on the close icon to close the document.

Figure: The close icon
Note
You must save changes made before closing the document. If you've made changes but haven't saved yet, you will be alerted to save your document before exiting.
If you don't want to save the document you can click on Don't Save and the document will close without saving the changes.
Selecting text
- Place the cursor on the first letter of the text you wish to select.
- Click and while still pressing the left side of the mouse, drag the mouse to highlight the text you wish to select. You can move right or bottom to cover the area you wish to select.
Copying text
To copy the selected text, follow any of these steps:
Method one
- Right-click on the selected text
- Choose Copy from the options
Method two
Press Ctrl + C to copy the selected text to the clipboard
Pasting copied text
- Move the cursor to the position you wish to paste the text. If there is no space at where you wish to paste, create one by placing the cursor at that position and pressing the Enter keyboard to move the cursor to a new line
- Right-click on the desired position and select Paste or press Ctrl + V to paste the copied text
Cutting text
When a text is cut, it disappears from where it used to be. Unlike copy where is only a copy which is made so the original text remains there, for cut, the text is moved to a new location.
The steps to cut a text is similar to copy except you choose the Cut option when you right-click on the selected text or you use the shortcut key, Ctrl + X to cut the selected text.
Inserting a picture from the computer
To insert a picture follow any of these steps:
Method one
- Navigate to where the picture is located
- Select the picture
- Press Ctrl+C or right-click on the selected picture and choose Copy
- Place the cursor at the position you wish to insert the picture
- Either right-click and choose Paste or press Ctrl+X to paste the copied picture
Method two
- Place the cursor at the position you wish to insert the picture
- Click on the Insert menu tab at the top of the word document
- Click on Pictures
- Navigate to where the picture is located
- Click on the picture you wish to insert and click on the insert button or just double click on the picture
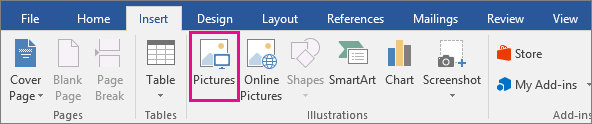
Figure: Inserting a picture
Inserting a picture from the internet
- Search for the picture in any search engine e.g google.com
- Right-click on the image and select Copy
- Place the cursor at the position you wish to insert the picture
- Press Ctrl+X or right-click and select Paste
Word also offers two options you can use to find and insert pictures.
OneDrive
You can insert an image stored on your OneDrive
Bing Image Search:
You can use this option to search the Internet for images.
By default, Bing only shows images that are licensed under Creative Commons, which means you can use them for your own projects.
To use any of the above options, follow the steps below:
- Place the cursor at the position you wish to insert the picture
- Click on Insert → Online Pictures
- Browse and double click on your desired image on your OneDrive. If you are using the Bing option, search the image in the search bar and double click on the desired image to insert
Note
You must be connected to the internet to use any of these options.
Resizing a picture
To resize an image, click and drag one of the corner sizing handles.
The image will change size while keeping the same proportions.
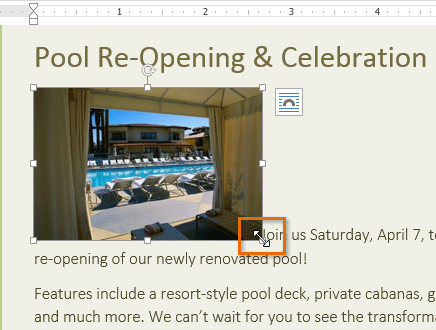
Figure: Resizing a picture

Figure: Corner sizing handle
If you want to stretch it horizontally or vertically, you can use the side sizing handles

Figure: Size sizing handle
Pictures & text wrapping
When you insert an image, it's difficult to move it exactly where you want. This is because by default the image is in in line with the text setting.
If you want to move the image freely, you'll need to choose a different text wrapping setting. To wrap text around the image follow the steps below:
Method one
- Right-click on the image
- Select Wrap Text and then choose the appropriate option aside the default (In Line with Text)
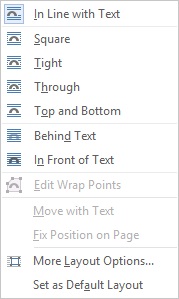
Figure: Text wrapping options
Method two
- Click on the image
- Select the Layout tab at the top
- Click on the Wrap text to show the drop down options
- Select the appropriate option
If you want to move the image freely, choose the Tight option.
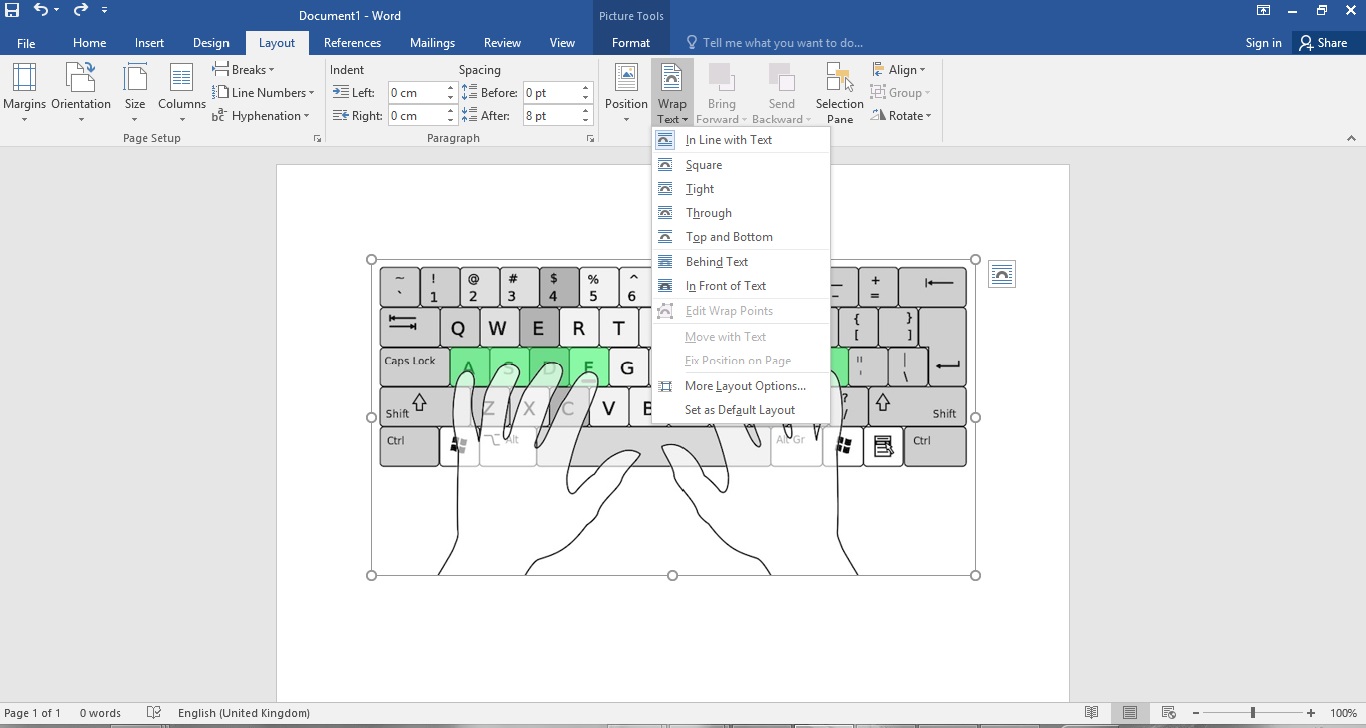
Figure: Wrap text option from the Layout tab
To see the effect of each of the options, click on the More Layout Options. You will see a picture showing each effects.

Figure: Wrapping style
Positioning the image using predefined image positions
- Click on the image
- Click on the Layout tab → Position at the Format section
- Select the appropriate position
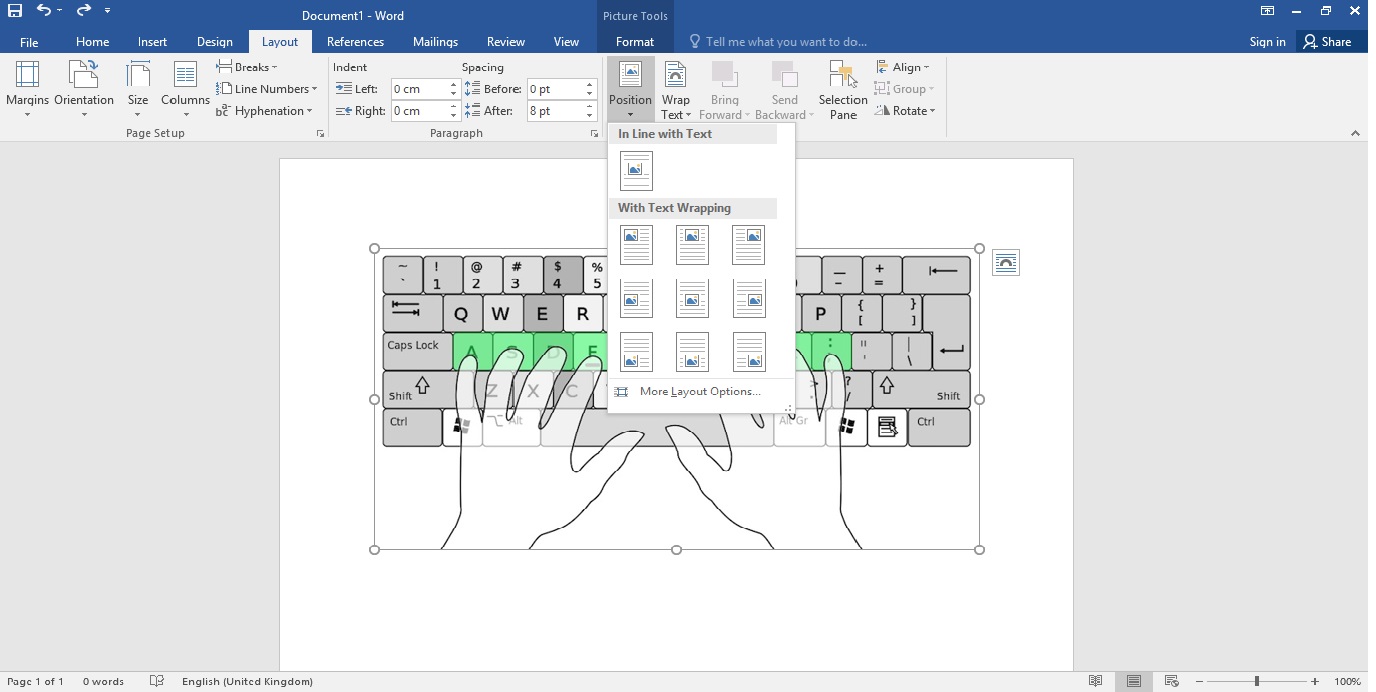
Figure: Predefined image positions
Find & Replace
Finding a text
- Go to Home > Find (at the top right) or press Ctrl + F
- Enter the word or phrase you want to locate in the Find box

Figure: Find & replace at the top right
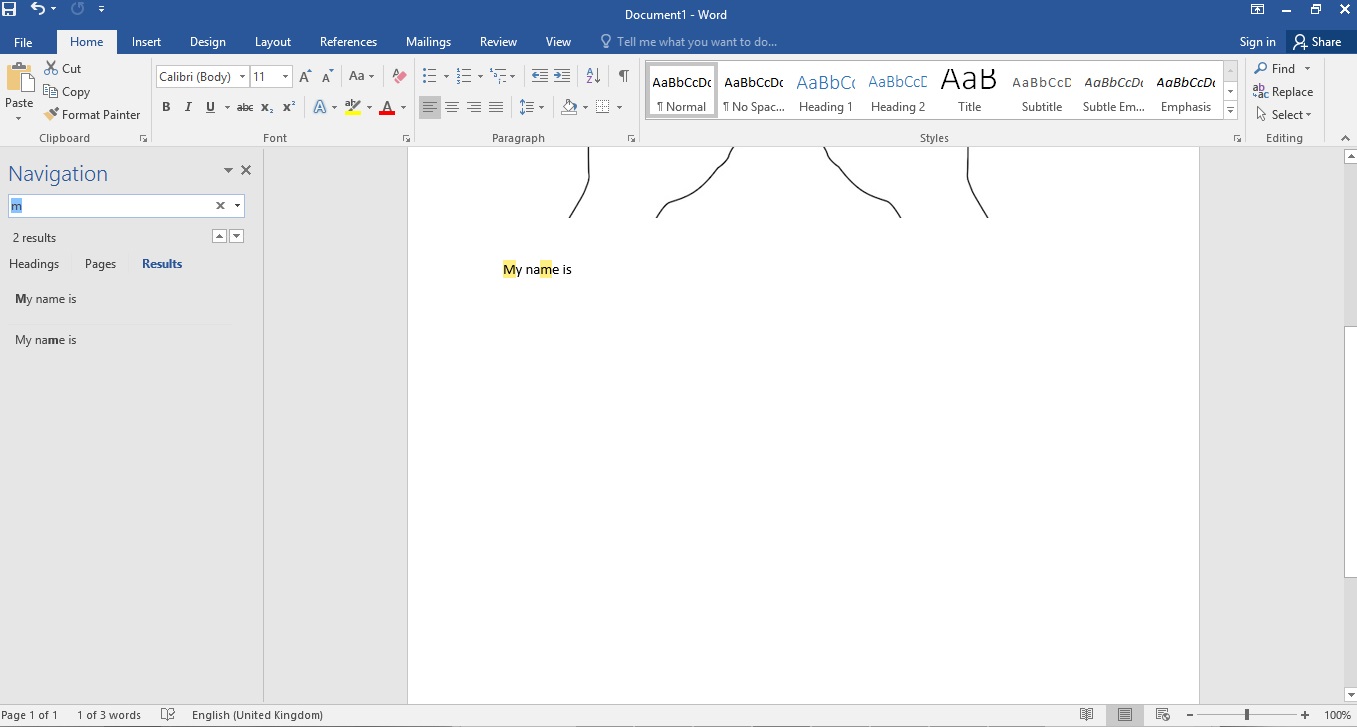
Figure: Navigation for searching text
Replace
- Go to Home > Replace or press Ctrl+H
- Enter the word or phrase you want to locate in the Find box
- Enter your new text in the Replace box
- Select Find Next until you come to the word you want to update.
- Choose Replace. To update all instances at once, choose Replace All.
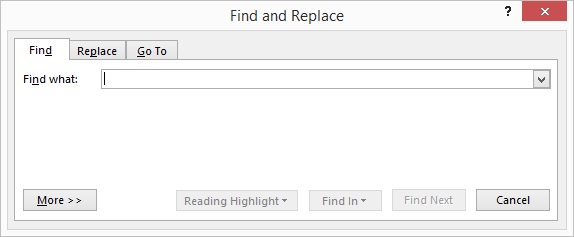
Figure: Find box
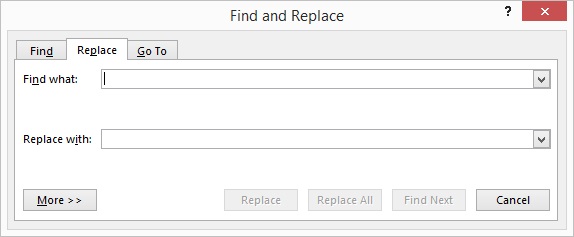
Figure: Replace box
To specify only upper or lowercase in your search, select More > Match case.
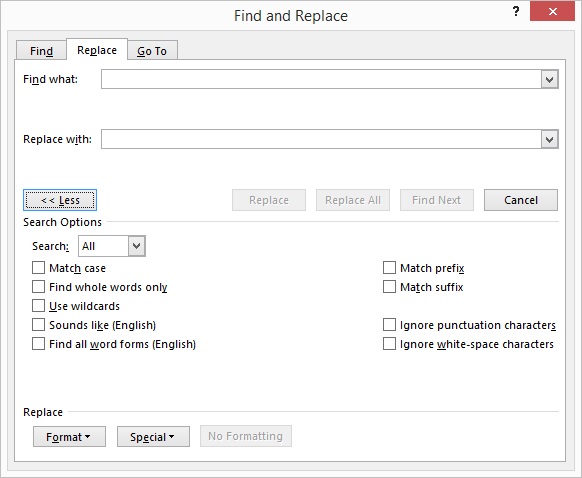
Figure: Replace (more options)
Spell Check
Word marks spelling, grammar, and stylistic issues with an underline. Right-click the underlined word, and then choose the suggestion you want, or learn more about the error and how to correct it.
You can manually check as well by following the steps below:
- Click on the Review tab
- Click on Spelling & Grammar.
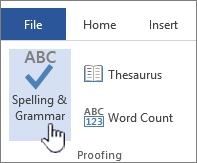
Figure: Checking spelling & grammar
If the program finds spelling mistakes, a dialog box appears with the first misspelled word found by the spelling checker.
After you decide how to resolve the misspelling (ignoring it, adding it to the program’s dictionary, or changing it), the program moves to the next misspelled word.
Word Count
To count the words follow the step below:
- Click on the Review tab
- Click on Word Count.
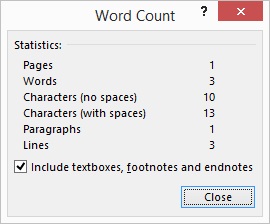
Figure: Word count result dialog
Special Symbols
To use special symbols like currencies and other symbols follow the steps below:
- Place the cursor at where you want to insert the symbol
- Click on the Insert tab
- Click on Symbol at the top right
- Select the symbol.
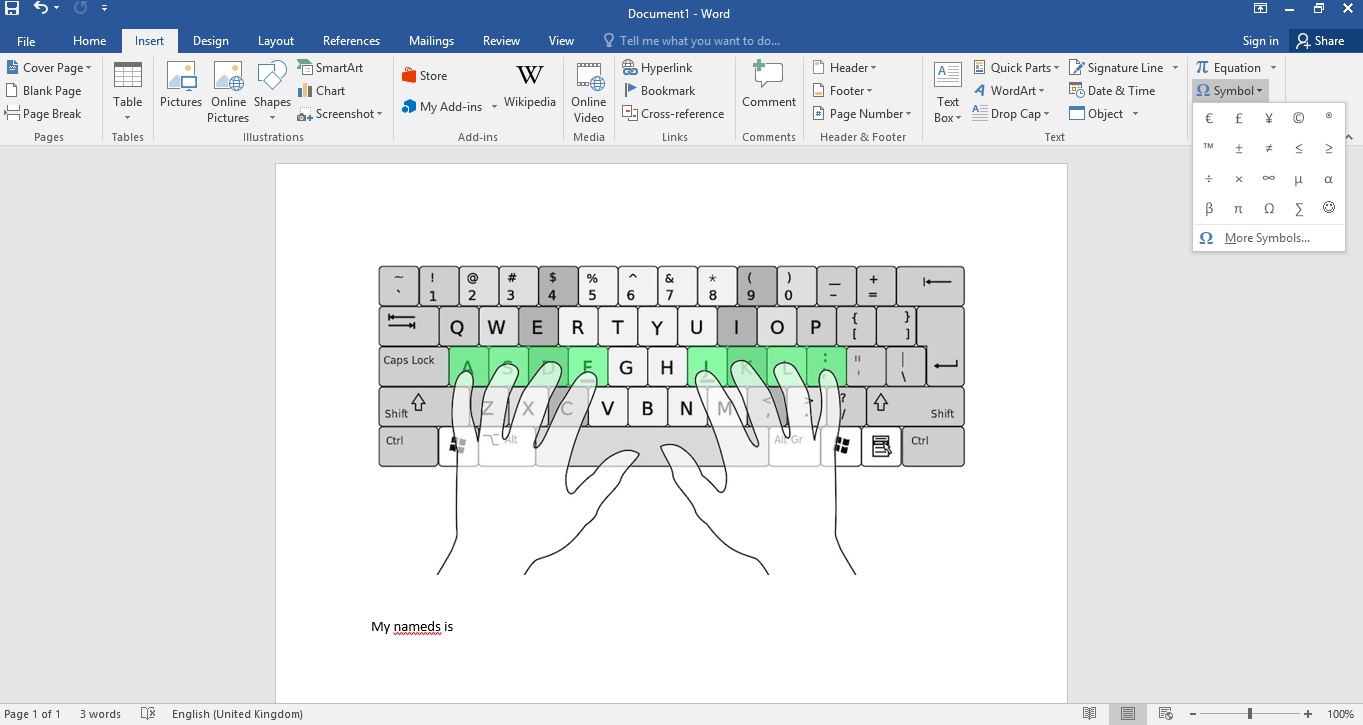
Figure: Inserting a symbol
The symbol is inserted when clicked.
If the symbol you want is not shown on step 4, click on More Symbols to show more symbols.
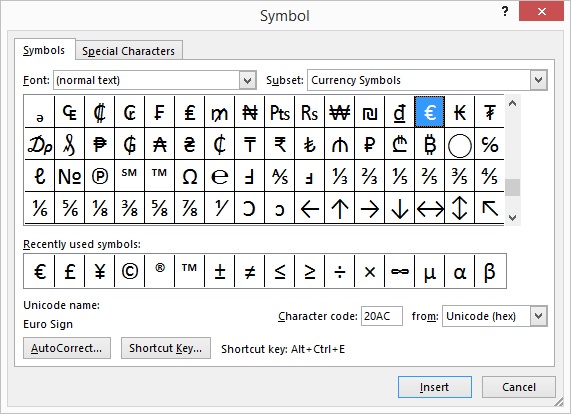
Figure: More symbols
Double click on the symbol to insert or select the symbol and click on the insert button. Once done, click on the Cancel button for the dialog box to disappear.
Inserting equations
- Place the cursor at where you want to insert the equation
- Click on the Insert tab
- Click on Equation at the top right
- Select the appropriate equation type and enter the equation
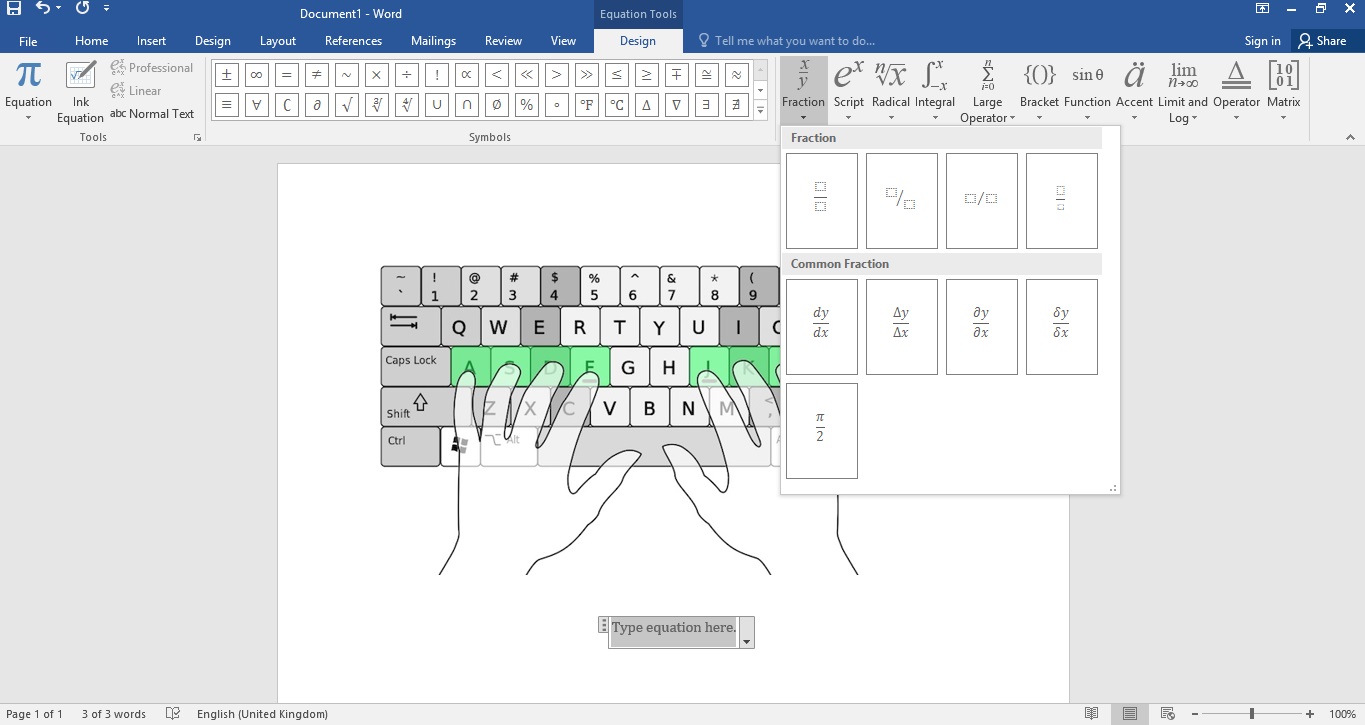
Figure: Inserting equation
Undo change
To undo a change, click on the undo icon at the top left or press Ctrl+Z
Figure: Save, undo & redo icons at the top left

Figure: Undo icon
Redo change
To redo change, click on the redo icon at the top left or press Ctrl+Y

Figure: Redo icon